This will guide you on how to configure a RabbitMQ cluster using an Auto Scaling Group. We use the Auto Scaling Group to deploy a RabbitMQ cluster so we can use it to have RabbitMQ nodes find each other and to use it as a target for the Load Balancer.
Launch Configuration
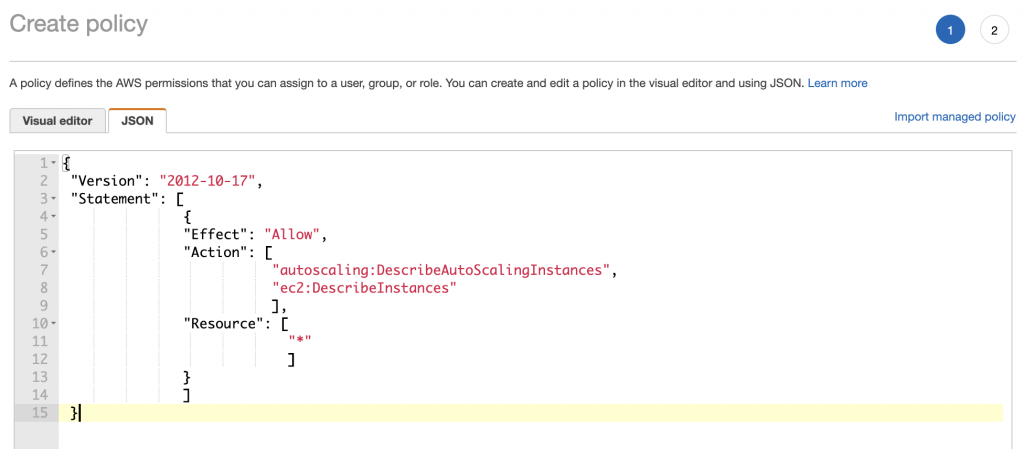
Create Policy
Create a Policy so the EC2 nodes can find the other nodes in the same auto scaling group.
{
 "Version": "2012-10-17",
 "Statement": [
               {
               "Effect": "Allow",
               "Action": [
                          "autoscaling:DescribeAutoScalingInstances",
                          "ec2:DescribeInstances"
                          ],
               "Resource": [
                            "*"
                            ]
               }
               ]
 }

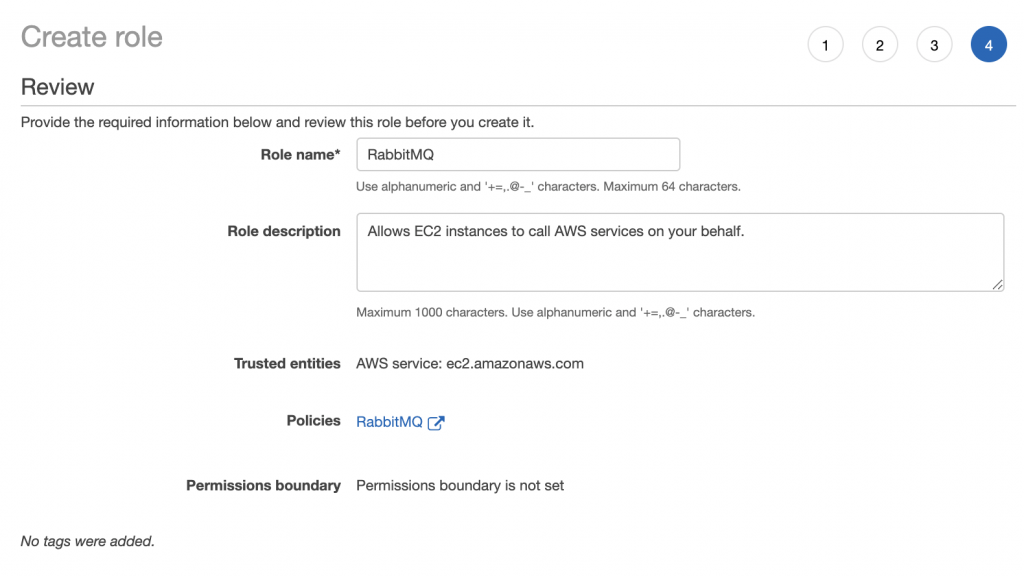
Create Role
Create IAM role to be attached to the EC2 nodes.

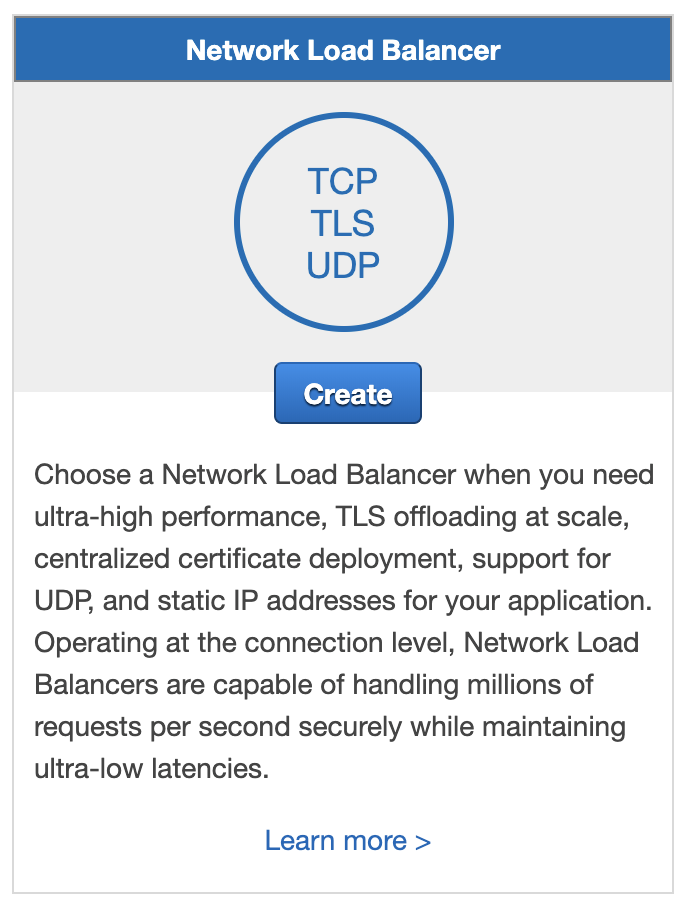
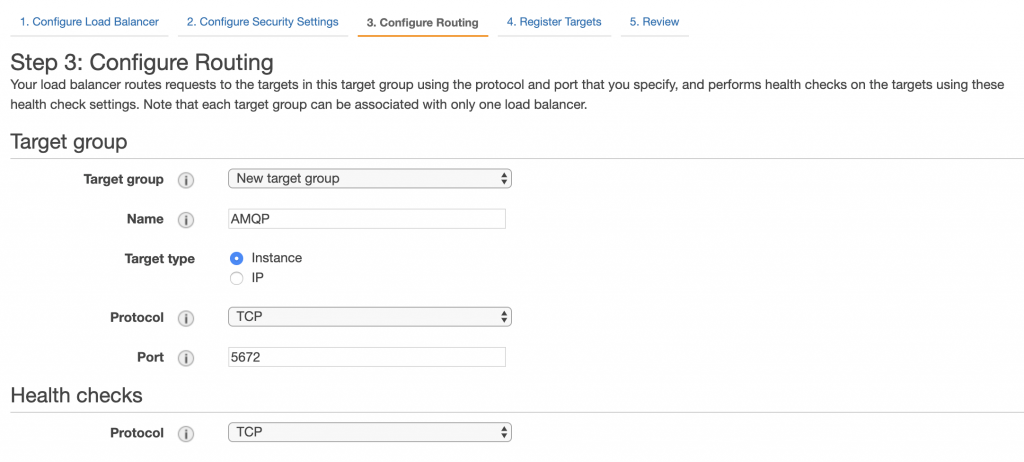
Load Balancer
Depending on your needs and what protocol you are going to use with RabbitMQ, you may want or not a Load Balancer. The type of Load Balancer will also depend on the protocol.
For AMQP connections you may not need a Load Balancer as most clients support multiple host names when connecting. Still, you may want to use a network load balancer (like in this example)
For Stomp over WebSockets you probably will want to have an Application Load Balancer. Having an Application Load Balancer will also allow you to terminate SSL on it.
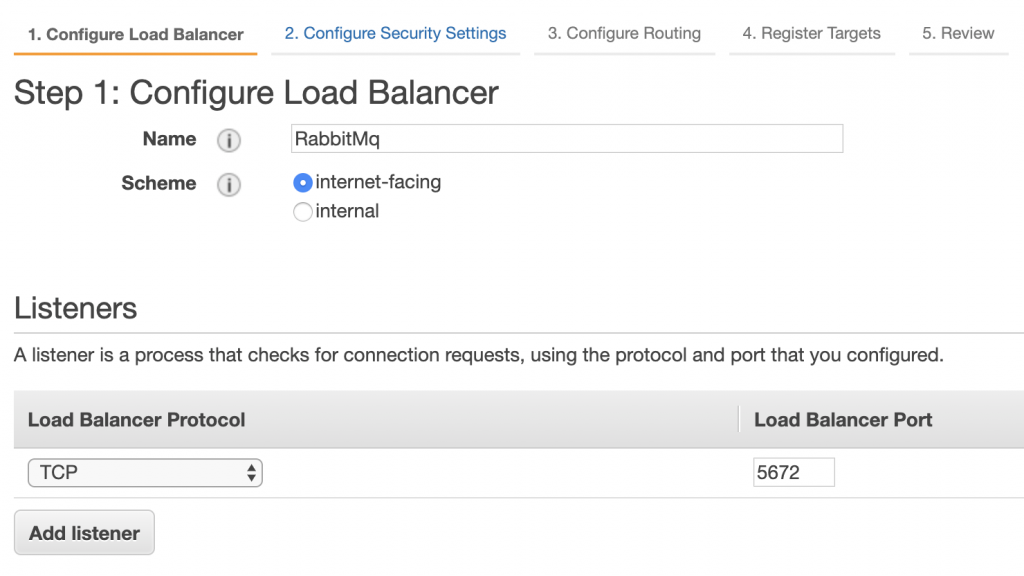
Create Network Balancer (optional)
Using a network load balancer has the advantage that you can use it for AMQP and also other HTTP based protocols.


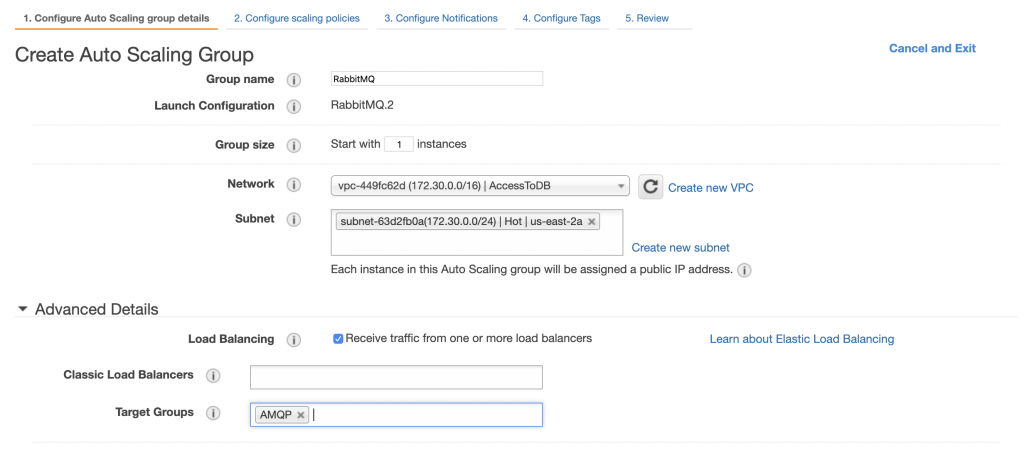
Auto scaling group
Create Launch Configuration
- Choose AMI

2. Select Instance Type.
Create Auto Scaling Group
If using a Load balancer, make sure to add to the Target Groups created for it in the “Advanced Details” section.
Configure Node
You can setup each mode manually, or you can create an image (ami) and use it as the base for your autoscaling group. The second approach will allow you to just scale up your cluster and automatically have the new nodes join it.
If you are going to setup one by one, make sure that you have the same erlang-cookie (/var/lib/rabbitmq/.erlang.cookie) on each node before restarting the cluster in the last step.
Install
sudo apt-get update
sudo apt-get upgrade -y
sudo apt-get install curl gnupg -y
curl -fsSL https://github.com/rabbitmq/signing-keys/releases/download/2.0/rabbitmq-release-signing-key.asc | sudo apt-key add -
sudo apt-get install apt-transport-https
sudo tee /etc/apt/sources.list.d/bintray.rabbitmq.list <<EOF deb https://dl.bintray.com/rabbitmq-erlang/debian bionic erlang deb https://dl.bintray.com/rabbitmq/debian bionic main EOF
sudo apt-get update -y
sudo apt-get install rabbitmq-server -y --fix-missing
Reset
Reset the RabbitMq Node so it will start fresh using the new configurarion.
With the rabbitmq-server running:
rabbitmqctl stop_app
rabbitmqctl force_reset
service rabbitmq-server stop
File descriptors
Adjust max number of file descriptors by editing /etc/systemd/system/rabbitmq-server.service.d/limits.conf:
[Service]
LimitNOFILE=64000
After changes to this file you need to reload the config before restating the server:
sudo systemctl daemon-reload
Erlang cookie
All the nodes have to have the exact same cookie so they can talk to each other.
The cookie is located at /var/lib/rabbitmq/.erlang.cookie and has one single line with a “string”.
RabbitMq config
The config files should be at /etc/rabbitmq. Adjust the settings according to your needs. You will need at least the rabbitmq_peer_discovery_aws plugin the nodes can find each other.
enabled_plugins to enable plugins using the config (instead of rabbitmq-plugins cli):
[rabbitmq_management,rabbitmq_peer_discovery_aws].
rabbitmq.conf for general config
cluster_formation.peer_discovery_backend = rabbit_peer_discovery_aws
cluster_formation.aws.use_autoscaling_group = true

loopback_users.guest = true
listeners.tcp.default = 5672
management.listener.port = 15672
management.listener.ssl = false
Ready, set, … Go!
If you are creating a base AMI to use in your auto scaling group, power off the node and create the image. Make sure to change your Auto scale configuration to use the new AMI.
If you are setting up node by node just restart rabbitmq:
sudo service rabbitmq-server restart